Hi Nesters! I am excited to report that after some crazy-busy weekends as of late, I had this afternoon to do some work and finish up one of my projects! Remember, once upon a time I had showed you guys my office space? Well, after closer look, I realized I was unhappy with my desk.
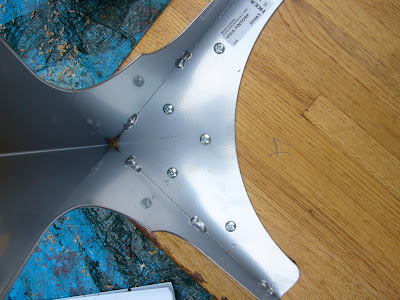
Since they are still a stainless steel color they are still modern but are also curvy and feminine.
After I picked these puppies up, I decided that the yellowed butcher block top was just not cutting it. So I threw it in the trunk and hauled it over to Moms for some rehabbing. I had some paint stripper laying around and followed the directions in the application process. {Remember always use these kind of strippers in a highly ventilated room.} I had already gotten stain for another project, but I decided to donate some to this one. After the stripping was complete: I was staining like a pro! I let it sit for 20 minutes or so, which is longer than the 5-15 minutes that are recommended because I really wanted the richest color I could get. Sadly, I had also forgotten my camera in all the hubbub that day and so, like a bad Blogger, I do not have pictures of the application process. {Two thumbs down for Gina.} But here is the process from there on out:
1) Measure out where you want to place your legs and mark. I decided to set mine in 1.5" from the edge to give it a but of an overhang.
2) After placing the leg on the marks, using a pencil, trace each hole.
3) You can see all the old holes from the old legs. If you look closely, you can see my markings for the new legs. Now, take out that power drill that we all have dusty in the basement and drill the marked holes. {Be sure not to drill all the way to the other side of the table top!}
4) Of course our next step is to drill those legs right in place! It's also a good idea at this time to number each of the legs and each of the corners. Since all legs are not created equal, and neither is every marking job, if you should ever need to remove them and need to put them back on, you will know where each one belongs.
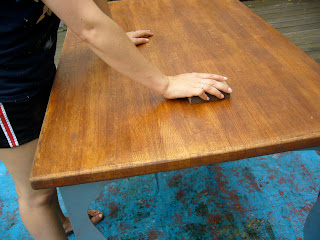
5) Now that the legs are on, I flipped it right side up and started sanding with a fine 220 grit sandpaper. {Loving those shorts aren't you? I know, don't be jealous...}
6) I picked up some Shellac from Home Depot to seal the stain in and make it a slick, workable surface. Do you love the color or what!?
Can you see the difference between the part that is Shellaced and the part that hadn't been yet? I was pleasantly surprised to see that it really brings out the color in the stain.
And finally here is how it looks back in its place now!
I'm thrilled with the way it turned out! With $50 and a little elbow grease, I took this desk form a boring character-less desk, to a much more fun, rich looking piece.


Gorgeous!!
ReplyDeleteAhhhh I love it. I have been catching up on ur blog since I have not been on in a few days.
ReplyDelete