Heya Nesters! Today I'm bringing you a new DIY project to spruce up that kitchen of yours. Remember way back when I wanted to flank my LOVE poster with this lemon printed fabric? Well I chose to go with a different accent for that piece and saved the fabric to use to make my dish towels look much more "Gina."
I made the trek to JoAnns with a mission. I needed 1/2 yard of this lemon fabric. I was a lucky lady because they didn't have much more than 1/2 yd left when I got there! *Phew* That was a brow wiper!
My next step was to head to Target to get myself a couple of inexpensive dish towels. I was going to get two yellow towels but I thought that it would be much more interesting and give much more dimension to the color scheme in the kitchen. Also, it would tie in the matchstick mats beneath the sink and oven that feature lots of green.
Armed with my super cute fabric and my dish towels, I was ready to get started. Are you ready to DIY!? Here we go...
1.) Make sure to wash and dry your towels. Towels in particular, tend to warp and stretch out of shape once washed due to the nature of the weave. Once they've been washed you'll know what kind of shape you're really working with for the long haul.
2.) Measure the width of your towel and decide what depth of trim you want.
My towel was 16" wide and I decided to make my trim 5" deep.
3.) That means I needed to cut a square from the fabric that was 17" X 11". I always use 1/2" seam allowance, so I know I need to add 1" to accommodate for the seam allowance on both sides.
4.) Measure and press the 1/2" seam allowance, wrong sides together on the 17" {or the side that jives with the width of your towel} sides. This will bring your 11" down to 10" so that when you fold it in half, will be a 5" trim.
5) Fold right sides together to create the 5"X 17" pocket. Press, pin and stitch at 1/2" making sure you reinforce stitches at the beginning and at the end.
6.) Now clip the interior corner edges.
7.) Now turn your little pocket right side out and press the bejeezus out of it. Including pressing the seams you just stitched open. It will give the final product a more finished look.
8.) Now that your pocket is prepped, it's time to add it to your towel. I chose to insert the end of the towel that had the tags trimmed off. You might as well keep it looking as clean as possible, right?! This part is kind of like putting a duvet into a cover: corners first. Put the corners of the towel as far into the corner of the trim as possible and pin. Then ease the rest of the towel in and pin, pin, PIN!
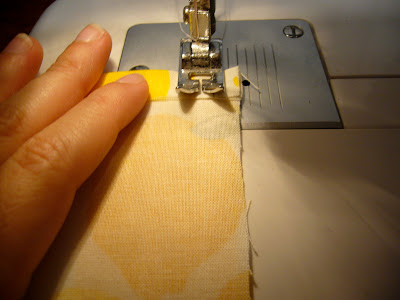
9.) Top stitch the opening down first at a 1/4". This will solidify the entire trim.
10.) You can leave it as it is now and be FINISHED! ...Or you can do what I did {strictly for aesthetic} and top stitch at the hem also. And just do a last light pressing to finish it off.
Now you have a pair of lovely little tea towels that are awfully like a good boyfriend: they will be there when you desperately need them! ...But look cute hanging around in the meantime.
As always, if you have any questions about how I made these or need some coaching on your own project, just shoot me an email and I'll gladly guide you in any way I can! Have fun Nesters!


--this fabric is hard to find! I found a little here--
ReplyDeletewww.CacheStash.etsy.com