

Last week, I began the long journey of nail head trim. And boy-o-boy what a journey it has been. I smacked myself in the face with a pair of pliers and just could not get the swing of the tack hammer under control enough to get those damn nails in.

As soon as I got in my car and drove away, I wanted to turn around and go back and get it right! So, I was anxious to get back to the action!

I had gotten a smidge further than I had last week. I was getting just as frustrated as last week when Kevin cut in and showed me again the technique of how to hammer. And it finally clicked. I even got a congratulatory high five from Kevin!
So here's what I learned: First- be sure you have the correct type of magnetic tack hammer.
 |
| via |
There are different kinds of tack hammers. This is one specifically for upholstery and the round, metal tips give it the advantage. There are ones that look exactly like this but have plastic tips. But those tips chip away with use and become an uneven surface and are difficult to use.
Next, you have to grip the hammer high up towards the metal part and use short, strong strikes and pause in between each. That's where I was really going awry. I was wildly hammering away, hitting the nails a million times and never stopping to assess where I needed to hit it. Since the nail head trim has a domed surface as a target, if you don't hit it directly at the center, you will bend it and have to start over again!
 |
| via |
I only did that about a thousand times, resulting in my pile of reject nails.

Of course this doesn't include the two dozen that I lost on the floor. Three hours later, I had almost the entire left side of the chair done!

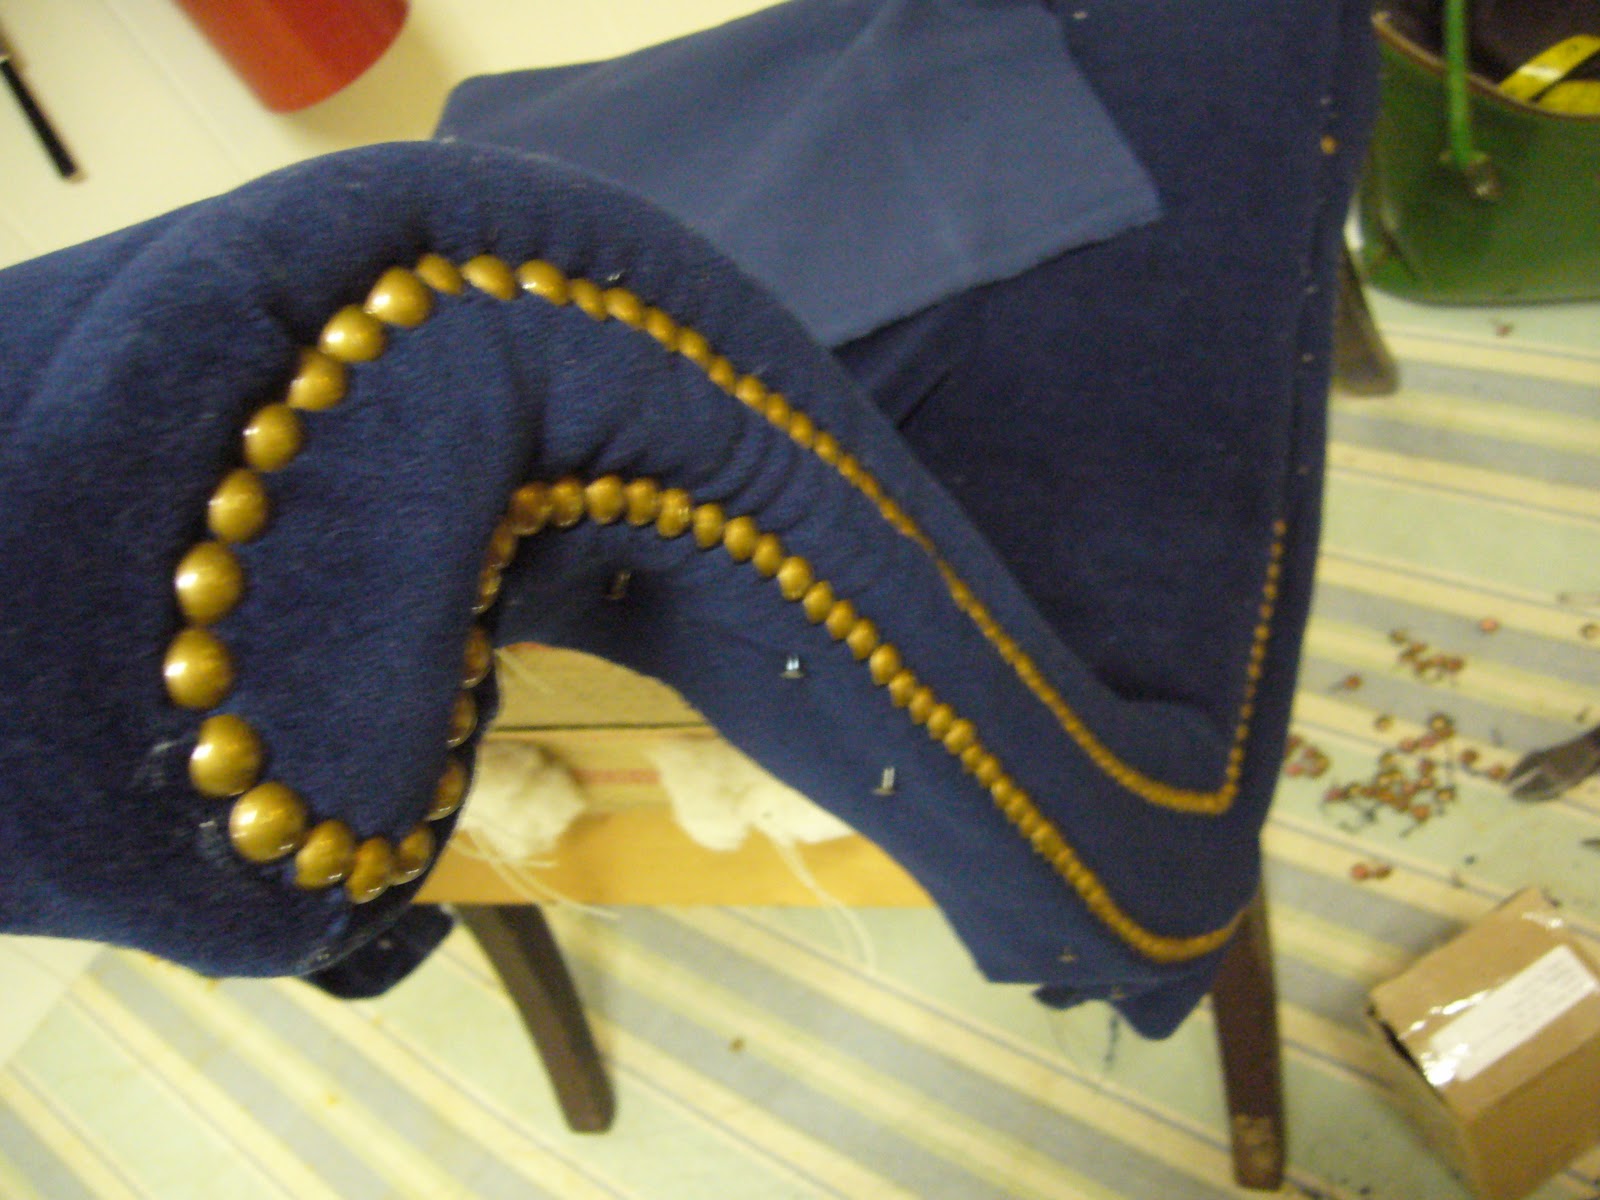
The most fun part was the curve at the top. It was harder, since there was so much fabric and cotton in a small space that sometimes it didn't actually hit wood and you would be able to just pull it right out! But I dug right in there and made sure those puppies were in there and weren't going ANYWHERE.

And that's about it, Nesters. I told you this week was going to be boring! I was really proud of myself for mastering the trim. Now that I know how to do it my speed has picked up and will continue to as I keep practicing. So maybe by next week, I will blow through the remainder of the nail head trim, add the back and cambric and be done!! {Wishful thinking}
What do you guys think? Have any of you done nail head trim, one by tedious one? Share your experience!! It sure makes me re-think making a headboard with nail head trim! Hope you all have a very happy Monday, Nesters! <3


Not a boring post at all - it's a really interesting post! Love the chair you're working on, and the nail head trim looks fantastic! I love that detail on a piece of furniture :-)
ReplyDeleteWe're never used proper nail head tacks, just the kind that come in a strip and you hammer in every 5th or 6th one. I know, cheating! The look isn't quite as good as the real official tacks, but at least it's fast.
Now that you're on a roll, I'm sure you'll get the nail head trim finished soon :-) Have fun at your next class!
I love, love, love the navy fabric and gold nail trim--totally drool worthy :)
ReplyDeleteCan't wait to see her all finished up!
Um, there's a "technique" to using nailhead trim? That doesn't result in a huge pile of wasted nails?! *News to me!* :) This is why I love that nailhead trim that lets you "cheat" by only nailing in every fifth hole. :) The chair is looking fan-cy! So impressive!
ReplyDeleteOoh, looks gorgeous!! Love the navy, too! Happy Monday!
ReplyDeleteWow, she's really comin' along! Definitely not a boring post. Some great tips!
ReplyDeleteNot boring at all. I always look forward to seeing your progress with Satine. The nailhead trim is looking great. It's obvious you've found your groove with it now. I bet the rest goes very quickly.
ReplyDeleteTotally NOT boring! The trim looks great!!!!
ReplyDeletexoXOxo
Jenn @ Peas & Crayons
Thanks girls!! You guys are the best cheerleaders a girl could ask for!! And yes, it would be easier to use one of those strips (though I've never tried) but I asked Kevin, my teacher, about them and he said that it would be harder with those to really work my way around all the curves. But I think its also that he learned from the old masters of the trade and he likes to do things the way the original upholsterers did! So, I guess I will too! I have to say, I'm happy that I have added this to my skill set and plugged through it and now I can do the real deal!! So exciting!! <3
ReplyDeleteThanks for all your sweet words guys!!