
Heya Nesters! Monday's just come on way too fast, don't they? If you don't know, on Saturday mornings, I take this little upholstery class. And I am obsessed. OBSESSED. I love Mondays so I can gush to you about what I got done in class. So let's start where we left off in week two. {See week 1 here!}

Gorgeous, ain't she?!

First step, was to cut off the twine that was helping the stay tightly glued together since the joints had become loose over time.
The next issue we had to deal with was how to fill out the curve at the peak of the back. My teacher Kevin and I discussed how we wanted it to be full and filled in, but we didn't want to just use loose, cotton batting the way the previous upholsterer did...

Pretty bad right? So we tackled the issue by adding the finger roll last week and this week, I pin-tacked on one band of webbing that would eventually be stuffed with cotton batting. This way, it would be contained and a solid piece, unable to float.


You may notice, the tacks have been removed and staples have replaced them. Being that this is going to be a highly visible part of the chair, we want it to be less bulky and as solid as possible. So Kevin busted out the air staple gun that is a little too intimidating for me to use juuuuust yet. He stapled the webbing in place as fast as lightening, as well stapling the batting right at the finger roll.

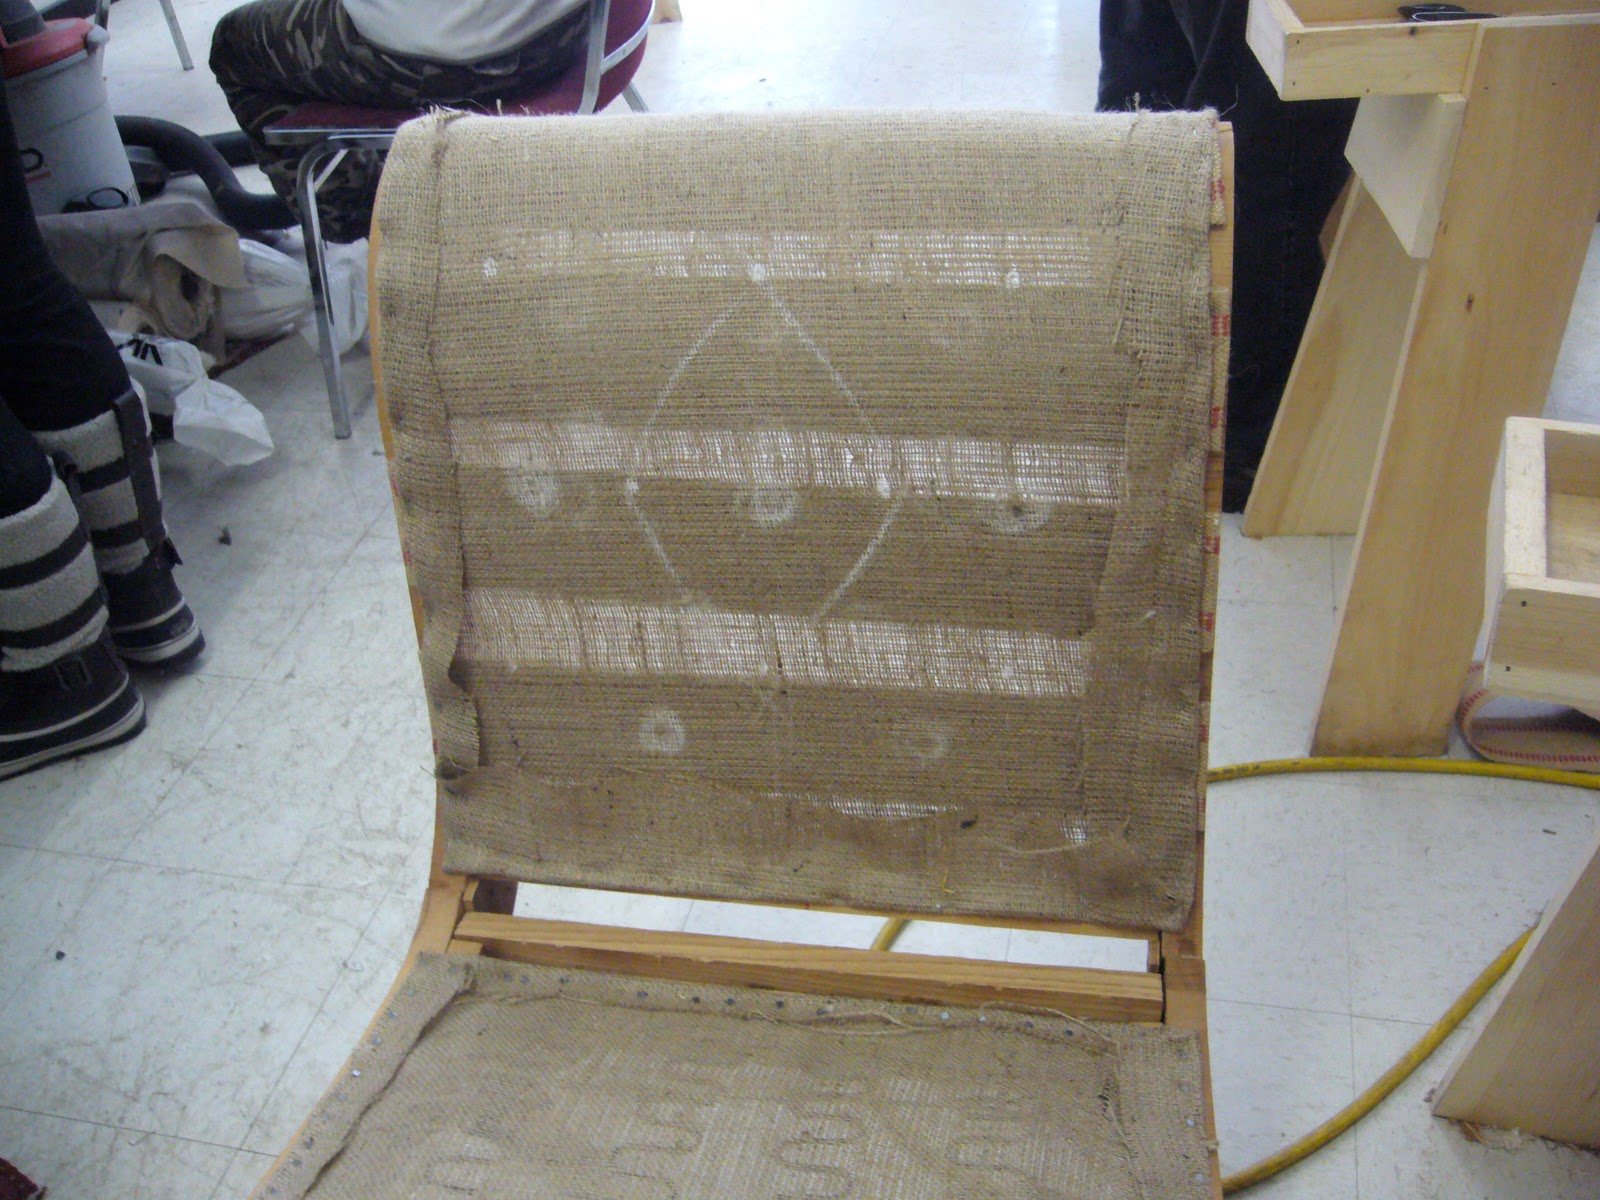
Then I covered up all that hard work with more burlap just like I did on the seat, pulling it tight from one side to the other, tacking every inch or so. I then, folded it back and stapled it in for a clean edge.

Notice those marks on the back? That is me, chalk in hand, figuring out where on earth to put my tufting buttons. I could mark up the burlap as much as I wanted since it would only be covered up. I had decided I wanted to go with a more traditional tufting pattern of 3 buttons on the top 2 on the bottom. Much like this:
 |
| Via |
Kevin looked at the bare chair, handed me the chalk and said, "I know where I think the buttons should be, I want to know where you think the buttons should be." I was stumped. I stared at it for a while. and then just started drawing.

See the giant "O's"? Yeah, those were all mine. *hangs head in shame* I like to think I am a pretty visual person. I can imagine the finished look of something when it's in the beginning stages, but this one totally had me. It was a completely blank canvas, and I could put my target anywhere! The pressure!
Then Kevin came to my rescue. The much smaller dots are his and as we talked about it, we decided the thing that was making it so hard was that the chair called for a third row of buttons! We decided to go with a plain, un-tufted seat, and the back will have a pattern of 3, 2, 3, like this...
 |
| Via |
It will create that beautiful diamond tufting that is made so famous by the decadent headboards that are so popular these days. Oh did I mention I want to make one just like this? Because I do.
 |
| Via |
Anyhoo, we drew out the finalized tufting pattern and decided once and for all to chuck the gross old cushions. We kept them around because we thought we might use them for a pattern for the new cushions but it wasn't worth it.

One last look at them before they go.... Arrivederci , disgusting cushions!

The last thing I did in class was tack on more finger rolls on the edges of the seat to round them out. Since the back and the front of the seat both have what Kevin referred to as "waterfalls" {or soft, rounded edges} we want the sides, which had sharp edges to mimic them. The finger rolls will soften the sides for the sitters' tush.
I had to leave class a smidge early to get ready for my "mystery date" with Matt. I mean, a girl has to have time to blow-dry her hair for her anniversary, right? {See what we ended up doing here!}
So there you have it Nesters! What do you think? So far so good? Can you envision it? Have any of you gone out and found a class for yourself?? I got my fabric today and I can't wait to tell you all about the debacle tomorrow! Happy Monday!


Wow! That is really coming along. It looks great so far. Sorry to hear you had a fabric debacle.
ReplyDeleteThanks Tanya! She's coming along well! I can't wait to start on fabric next week!!
ReplyDeleteThis is so cool! I had no idea all the stuff going on underneath upholstered chairs. Love your decision on the tufting!
ReplyDeleteI love the buttons! One question for you: are your hands pretty beat up after one of your classes?
ReplyDeleteI reupholstered dining room chairs a year ago (and am getting ready to do it again) and my palms were bruised for a few days from the staple gun. Satine is a lot bigger than my chairs :)
Loving the questions and comments you guys!! I must admit I didn't know all the goodies id find in my chair either!
ReplyDeleteAnd KT - I am filthy after class but not beat up. The staple gun we use is an air pressurized one not a manual one so I makes life easier but I do prick myself on tacks all the time but I'm immune to that with all the times I've stabbed myself with pins while sewing!! Haha
Thanks so much for the comments guys! I can't wait to hear more!!
THis is super exciting! I'm green with envy. I would LOVE to take an upholstery class. Good for you!!
ReplyDelete