
Now, I promised I wouldn't just write about wedding stuff, so today I am keeping to my promise. Today is back to my bread and butter … my roots … my thats right, upholstery.

A few months back, I splurged on Selfie-Christmas present and signed up for another upholstery class at Upholstery On Broadway. I happened to be prepared to start class with another freebie trash pick. This was a chair Matt and his fellow gym owners found while they were cleaning out the space that is now the gym. He brought it home to me, because he knew I could make something of it. And I was so excited to finally give it new life.

I originally had spray painted the frame with Rust-Oleum Metallic Pearl Mist Spray Paint and man-o-man did that turn out poorly. Not only did it not cover it evenly color-wise, {and not to toot my own horn here, but I am pretty well versed in spray painting.} but it clumped up and felt like a gritty sandpaper surface. You may be able to look closely and see the top right picture that shows this first step. Bad news bears. I opted back to my old fashioned ways and got a small can of a high gloss medium gray paint, sanded down the horrible texture that had been left behind and painted over it with a 1" angled brush.

I had to completely strip this chair down before building it back up with its original springs. I needed to use 8 way hand ties {Which gave me blisters for weeks.} before covering with burlap, a finger roll and artificial horse hair. I filled in the gap left by the finger roll with cotton, and then covered the whole seat with 1" high density foam. I re-webbed the back in both directions {not as tightly as the seat, since it doesn't hold the same amount of weight} and then applied the burlap over that as well.
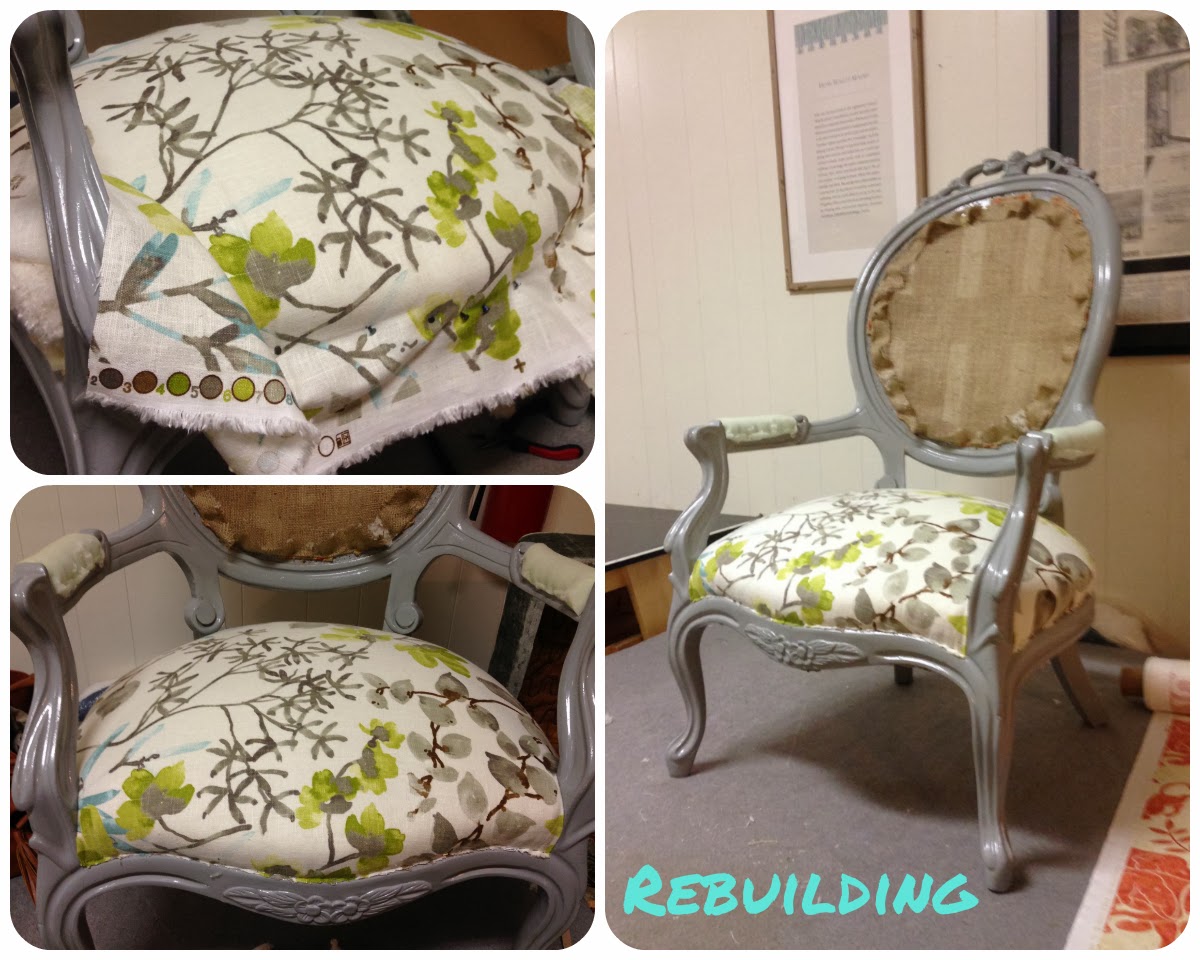
I had purchased this fabric a while back, Gazebo by Braemore in Cloud, from Mary Jo's. I had bought 3 yds for a table cloth for our dining room table last spring and I knew I had just enough left to do the majority of this chair.

I also had just a wee bit of a Premier Print Twill Storm Gray and White Canopy Stripe from Fabric.com left laying around. I knew I loved the two together and wanted the chair to look different pushed in, than pulled out. Originally I wanted floral on the back, and then stripes on the seat and inside back. But when I laid everything out, this just made more sense.

And after 8 weeks of this labor of love.... I brought Alice home. {I don't know if I like Alice... but she's kind of Alice in Wonderland-y, no? Suggestions welcome!!} And it just so happened that Matt and I went shopping at Home Goods right before I brought Alice home and lookie what we found...

That's right! $800 for my chairs sister. Mine was not the cheapest in the world, because the class is definitely a splurge, but I got my hands dirty, got out of the house, and get to say to people that "I made this." And man-o-man does that feel good to say.
Hope you guys are having a good week!!
xoxo
G


Your chair is amazing! I love the combination of fabrics. You're right that the stripe on the back makes more sense, and the colors are beautiful with the gray frame. You're getting so good at this!!!
ReplyDeletehey love your blog..and you did a really good job with your chair , even nice colour.. for me I would prefer darker side of colours.. you have really nice skills..
ReplyDelete